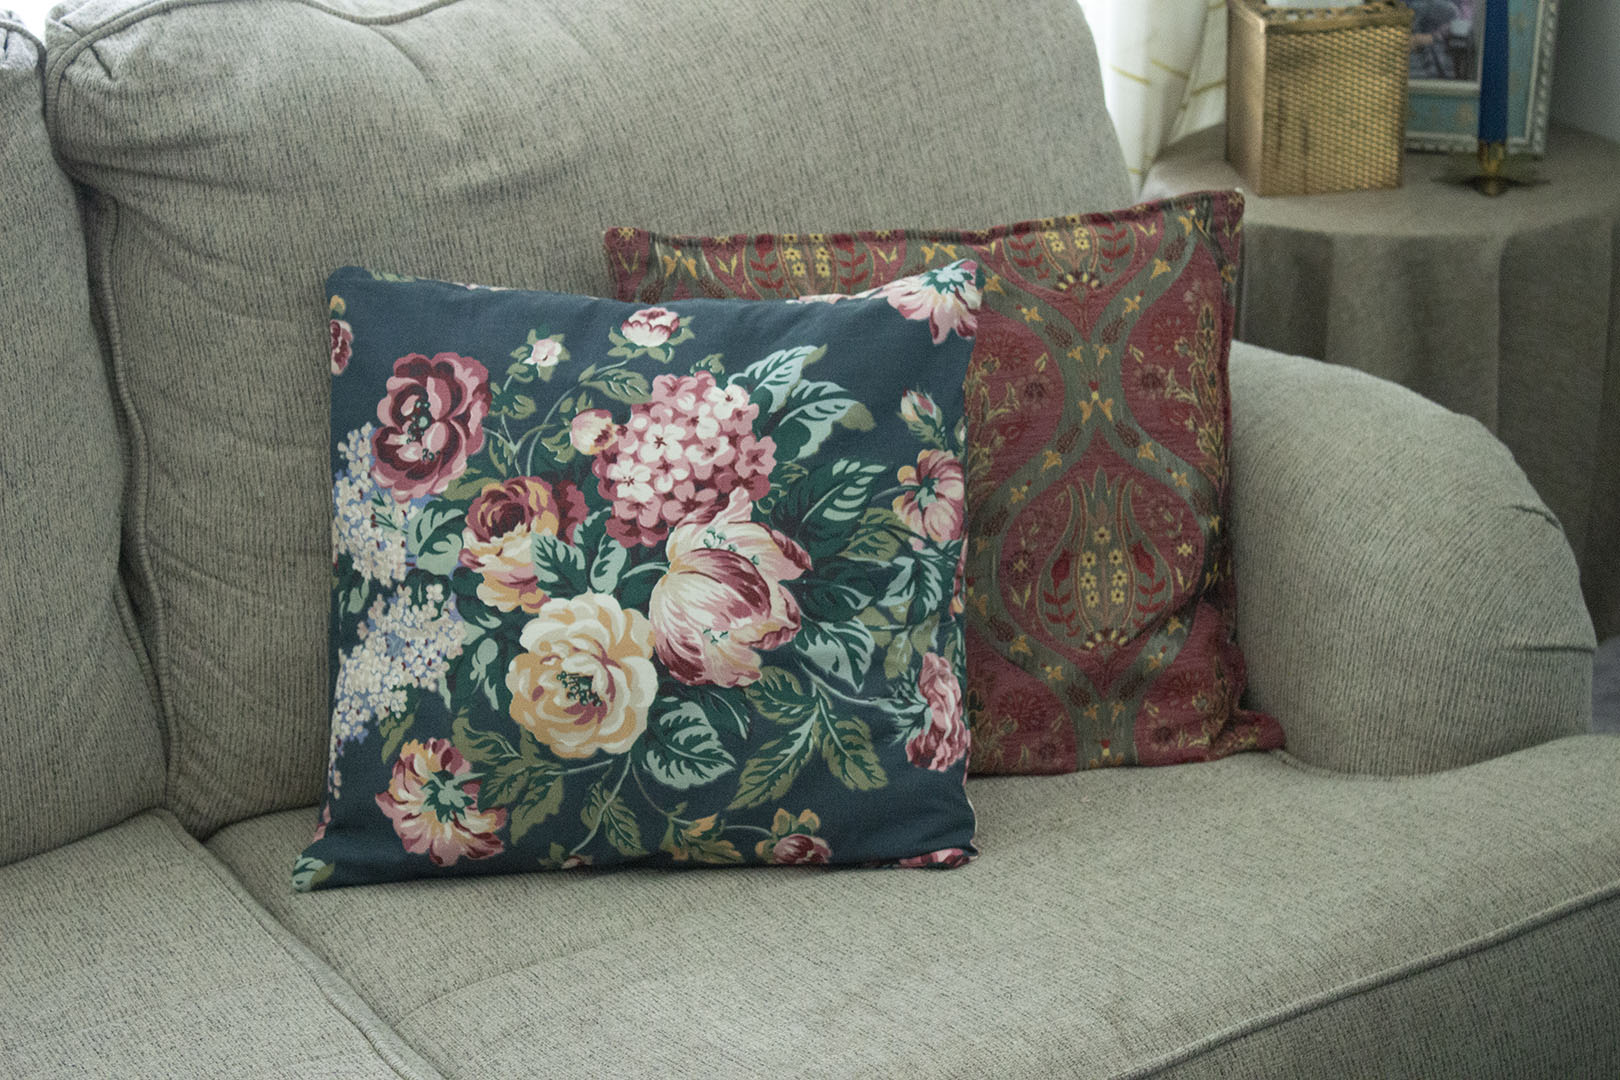
I recently thrifted a set of two beautiful floral curtain panels for $4.99. Rather than use them for the intended purpose, I upcycled them into some easy throw pillows. This DIY pillow tutorial will show you how you can do the same thing, with basic sewing skills.
Thrifted fabrics can be repurposed in a variety of ways. It’s a great way to save used textiles from filling up landfills.
I used one of these curtains as a tablecloth for my outdoor tablecape. I used the second panel to make some covers for my throw pillows.
This post describes my process of creating pillows from a curtain. It is not meant to be a precise tutorial. If you make your own, you’ll need to make adjustments to accommodate the unique size and shape of your pillow insert.
I wanted to create the kind of pillow case where there is a pocket in the back to insert the pillow form. This requires three pieces to be cut out. One piece is the size of the pillow front and two pieces are the same length as that square but less wide.
I used an existing pillow cover as a template to cut out my larger square. I cut about a half inch wider on each side to give a seam allowance.
Then I cut two smaller squares, strategically cutting along the hem of the curtain so that I wouldn’t have to sew my own hem. The hem should be positioned on one of the long sides of each smaller piece. The red arrows in the photo below point to the hemmed edge of the fabric.
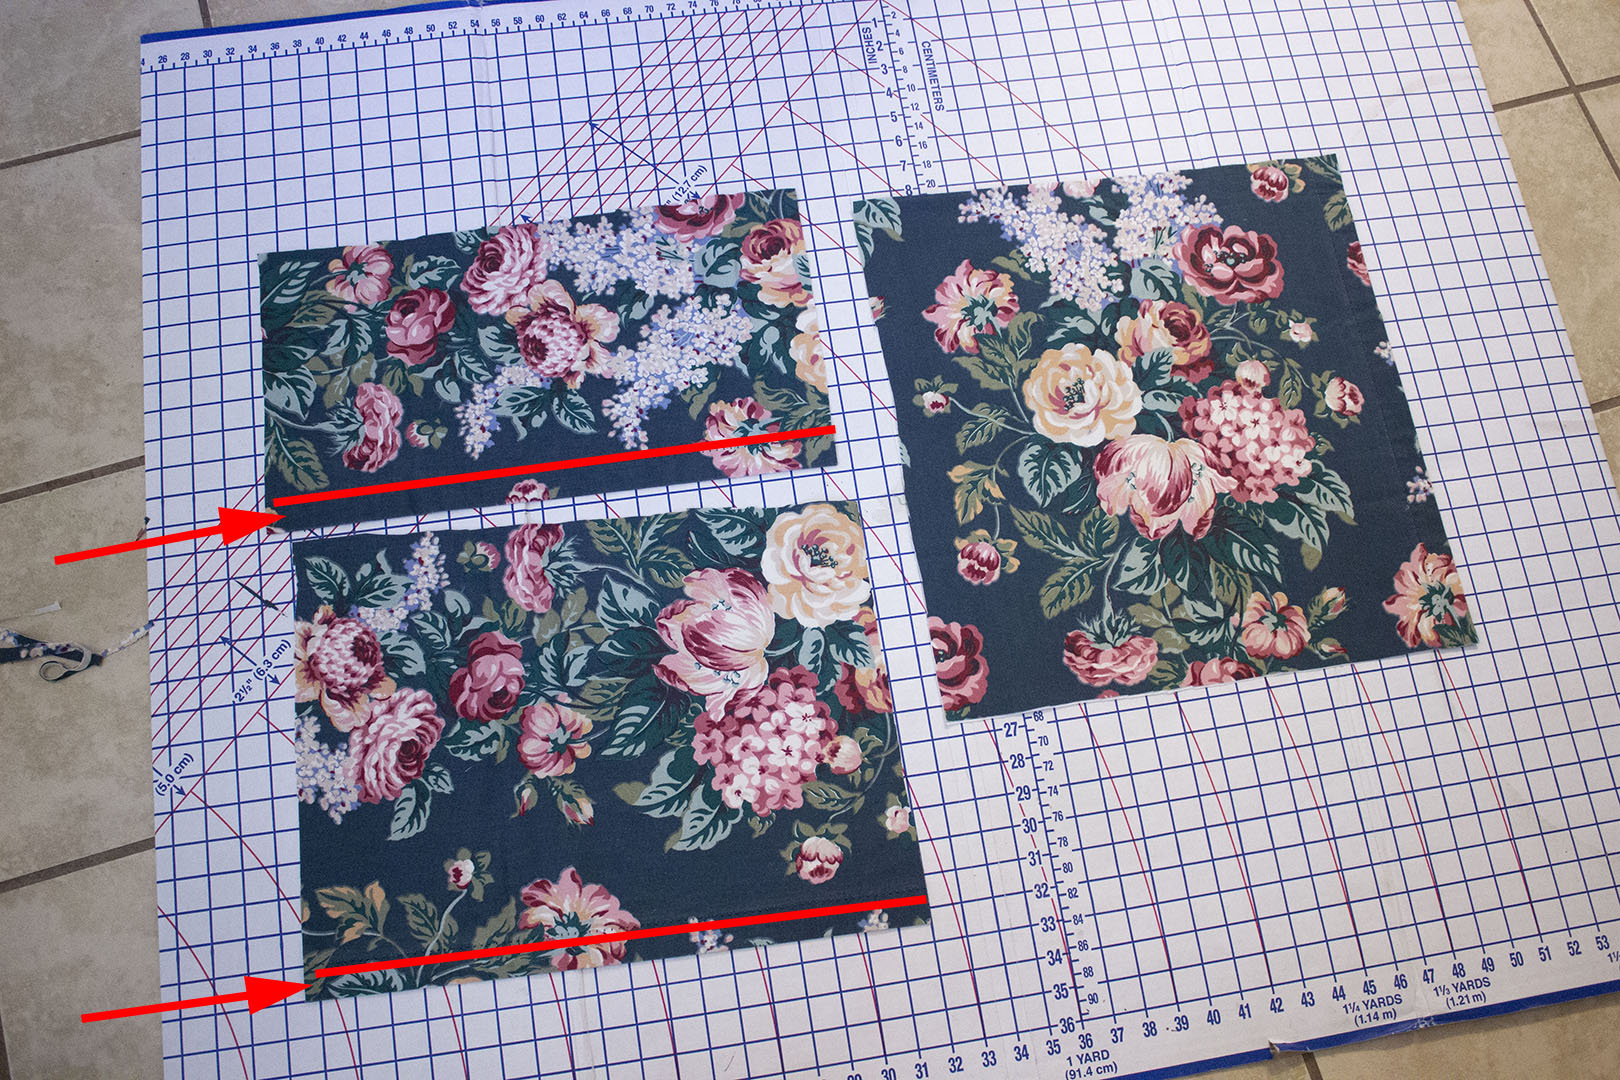
My pillow insert was 17”, and my three pieces were cut in the following sizes:
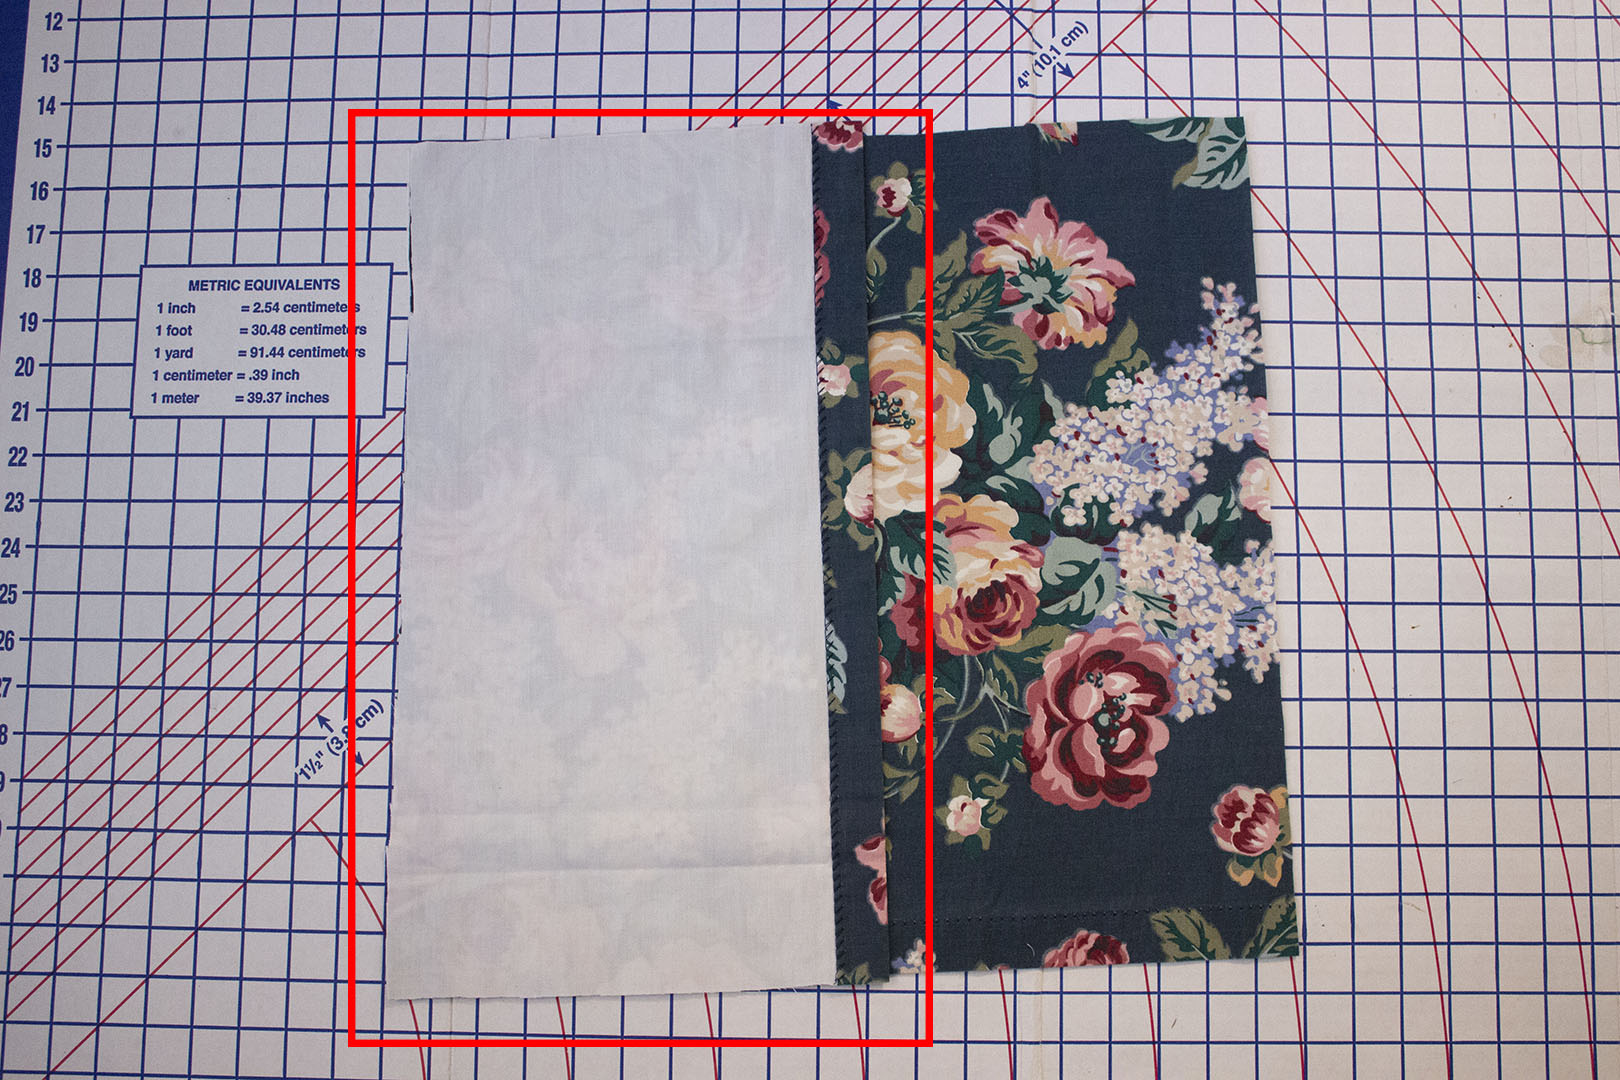
Then I laid out my pillow pieces for pinning. First, lay down your large square, with the patterned side of the fabric facing up. Then, layer on the smallest piece, with the patterned side of the fabric facing down. Line up the long unhemmed edge with the left edge of your larger piece. The hemmed edge should be sitting near the center of the large piece.
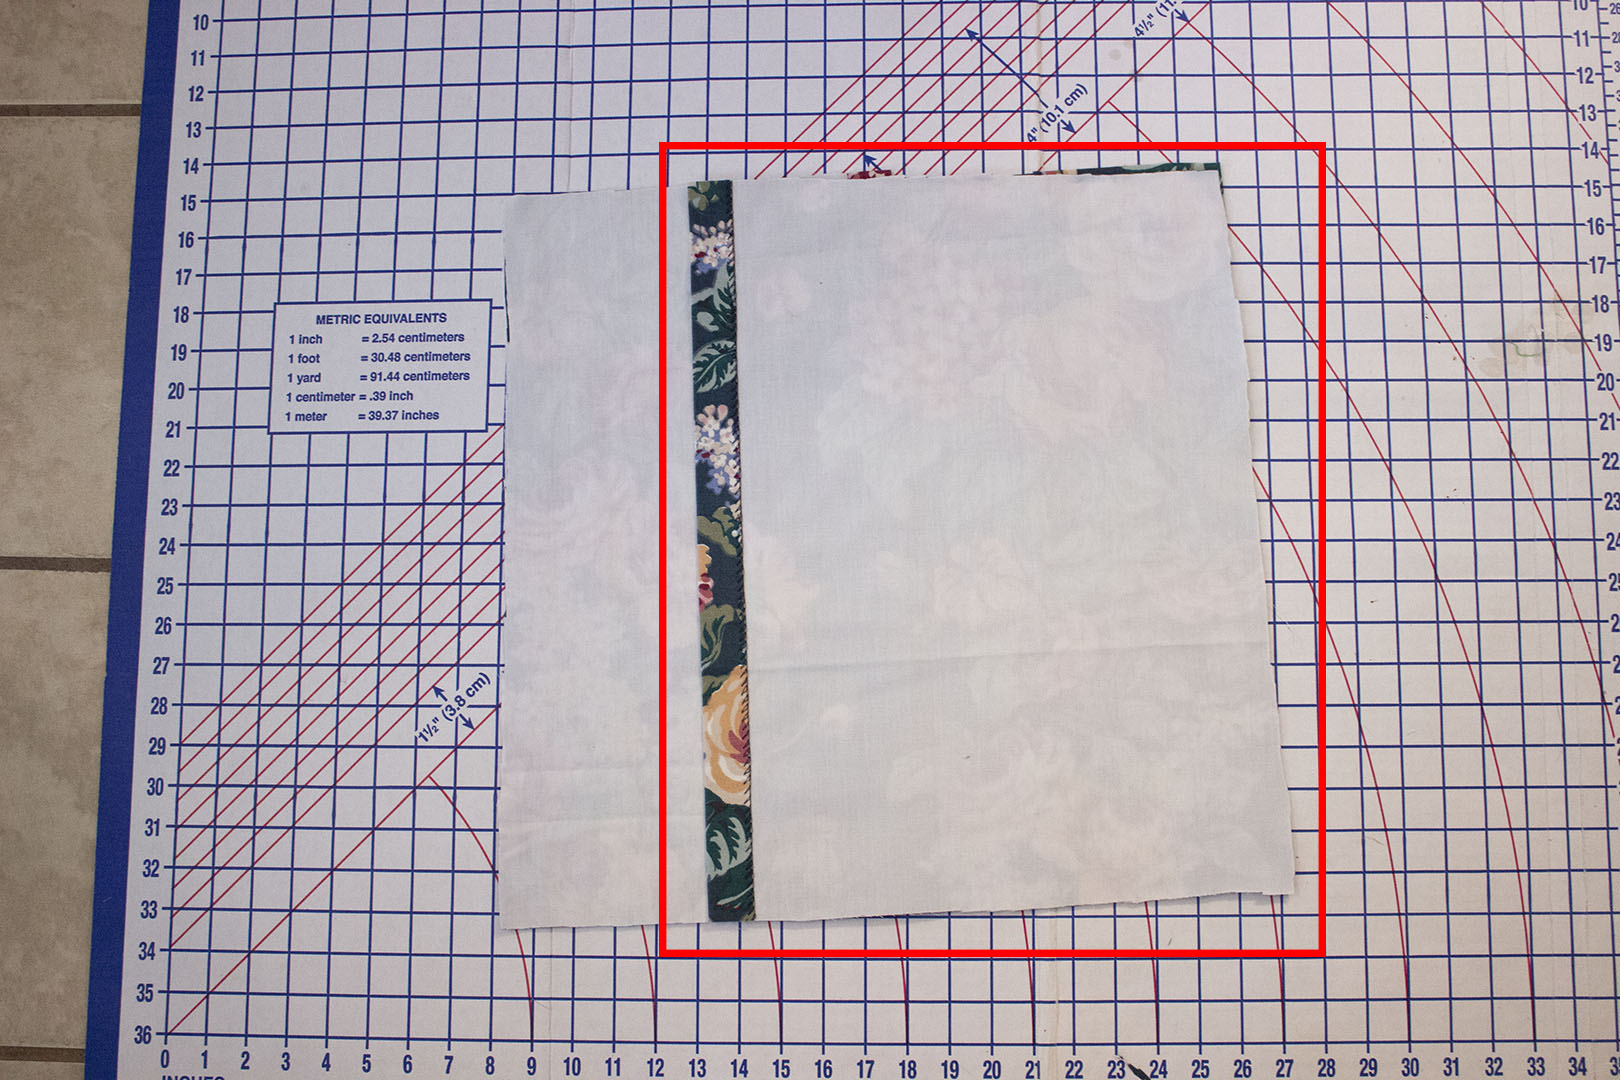
Then, lay down the second smallest piece. Line up the unhemmed long edge with the right side of the larger square. The hemmed edge should be near the center of the large piece.
When these pieces are sewn together around the edges, you’ll be left with an overlapping pocket that can be opened to fit the pillow insert.
Pin around the edges of the largest square fabric piece. It’s always good to consider the direction you’ll be feeding the material through the machine. I like my pin heads to be facing me so I can easily pull them out toward me as I sew.
The final step was to sew around the edges, leaving the half inch seam allowance. I backstitched at the beginning and end to keep the thread from unraveling. I removed the pins as I sewed.
Then I flipped the case right side out, and inserted my pillow. I used 18” pillow inserts, but I ended up leaving the old cases on them and layered the new one over the old one. This gave the pillows more fullness.
You can copy these steps to create pillows from any thrifted material that already has a hem, like a curtain or tablecloth. Just adjust your measurements based on the pillow insert you are using.

Check out my reel on Instagram where I showed the steps of this project. Be sure to follow me for more inspiration!

Design, thrifting, and entertaining are my passion, and I share that passion with you through this blog. I also love being in the kitchen and crafting cocktails. I love Jesus and occasionally, I talk about him too. He has been so powerful in my life, and I love to bring him glory with my hobbies.
©2026 Lauren Correa. All rights reserved. Design by Lauren Correa.