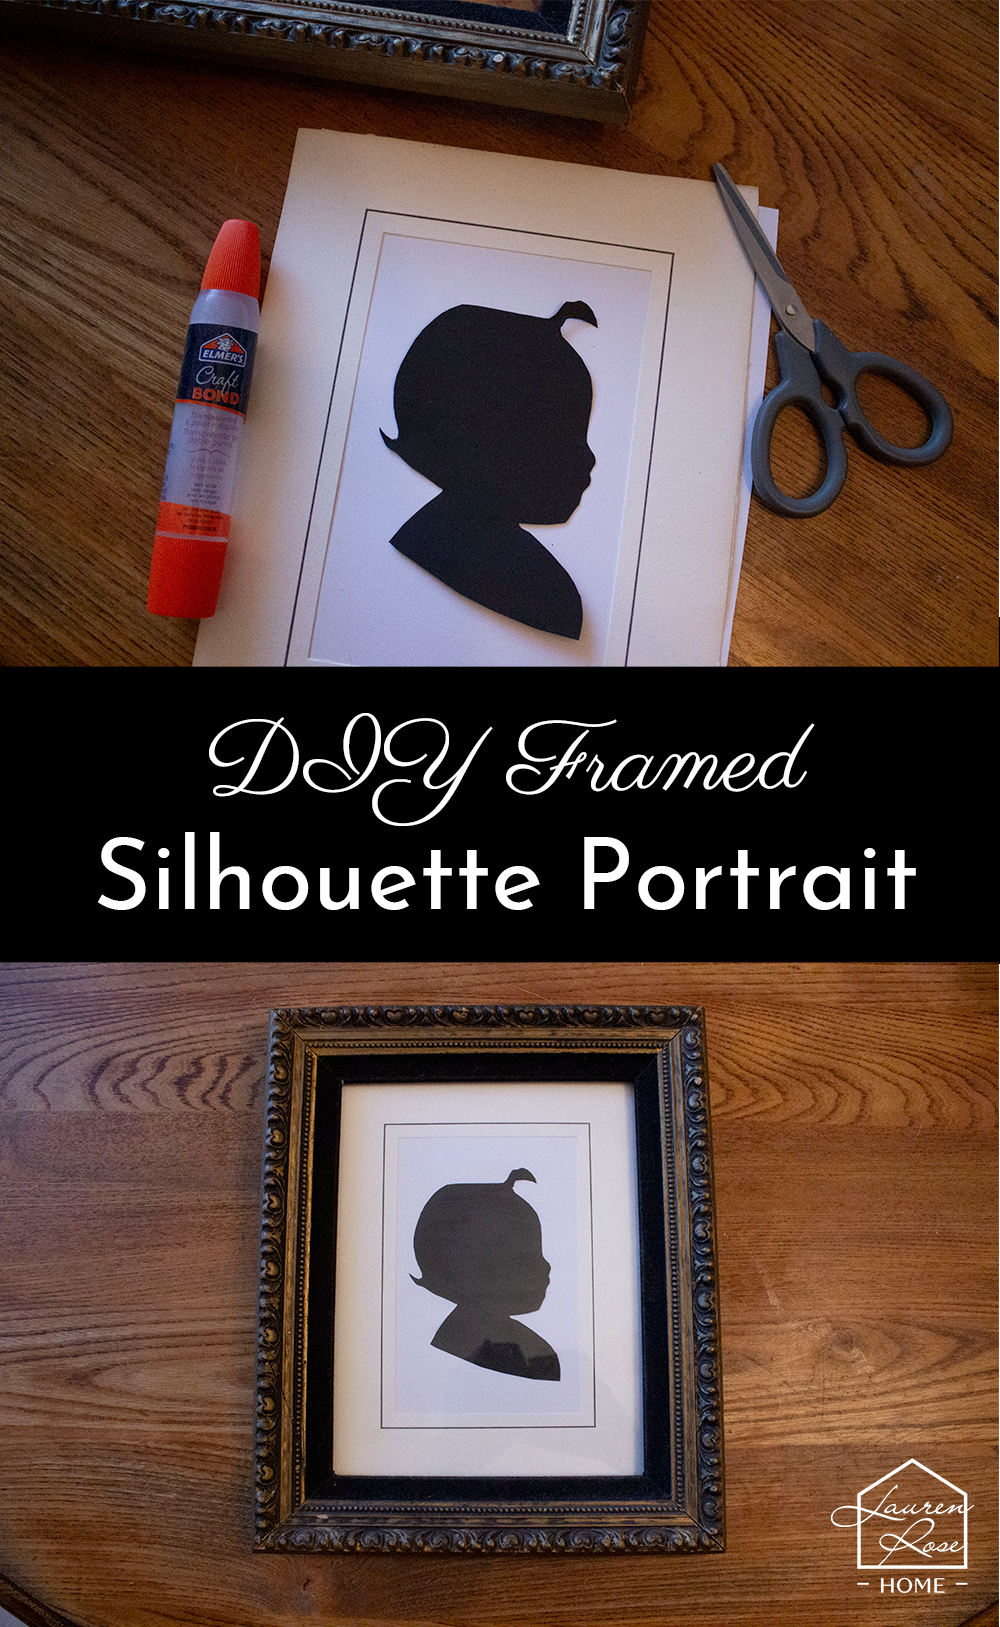
This is a super simple project that turns out beautifully! My mom used to make these for the kids who attended Cubbies, a children’s program at our church. They always came out so cute and parents loved taking home a silhouette of their child. My mom had hers hanging proudly in our home and they looked great!
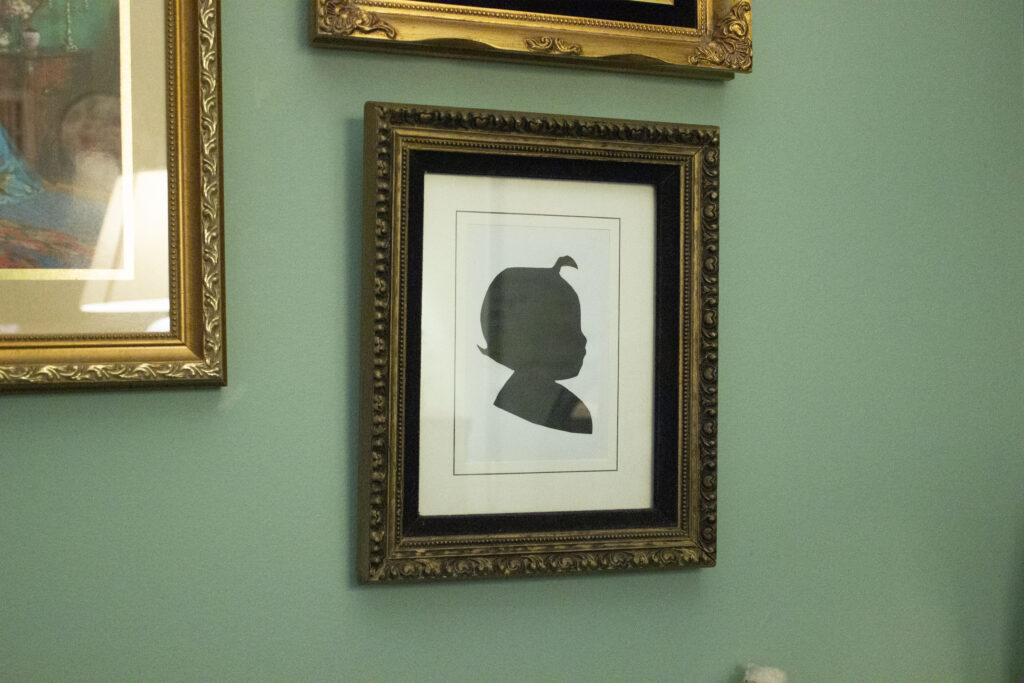
The great thing about this artwork is that it makes a wonderful keepsake. It’s something you will cherish for years to come! Follow along with these easy instructions to create your own DIY framed silhouette portrait.
Capture a photo of the profile of your subject. In my case, I used a photo of my daughter. She was wiggly so it was actually a challenge to get a photo of her at this angle! I printed this out on a printer that was running low on ink, which is why the photo isn’t clear. It still worked for this purpose though!
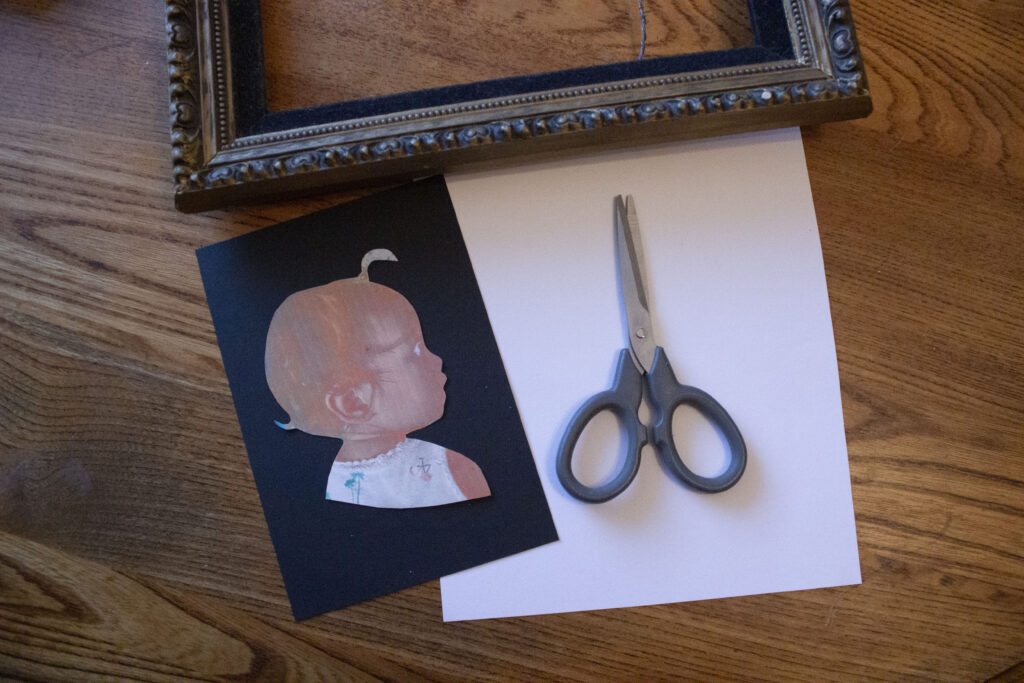
Using the small scissors, cut out the profile from the photo. You can add little embellishments (such as eyelashes) to make yours more stylized. In my case, I added a little curl to her hair. This curl usually shows up, but it didn’t in the photo I took because her hair was a mess. Also, keep in mind that you’ll need to stylize the neck and chest area a bit. You can mimic the way I did mine or look online for other examples to follow.
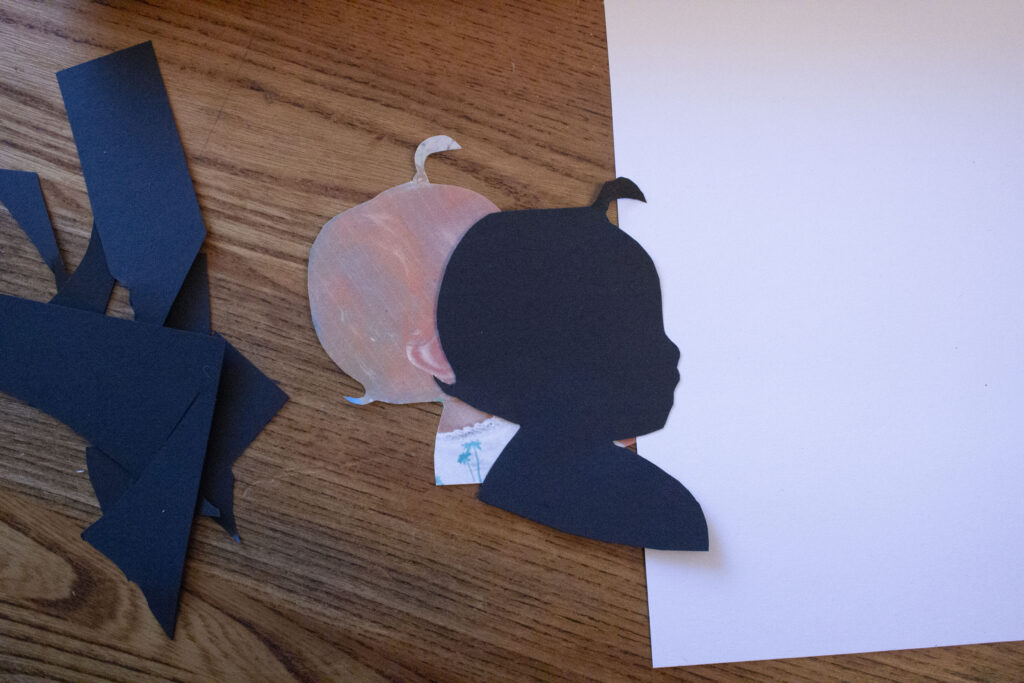
Lay the cutout over the black paper and cut the black paper according to the pattern you’ve created. I held the pieces together with my hands and simply cut out the profile using the photo as my guide. However, you can use rolled up pieces of scotch tape to attach the profile to the black paper to prevent it from slipping.
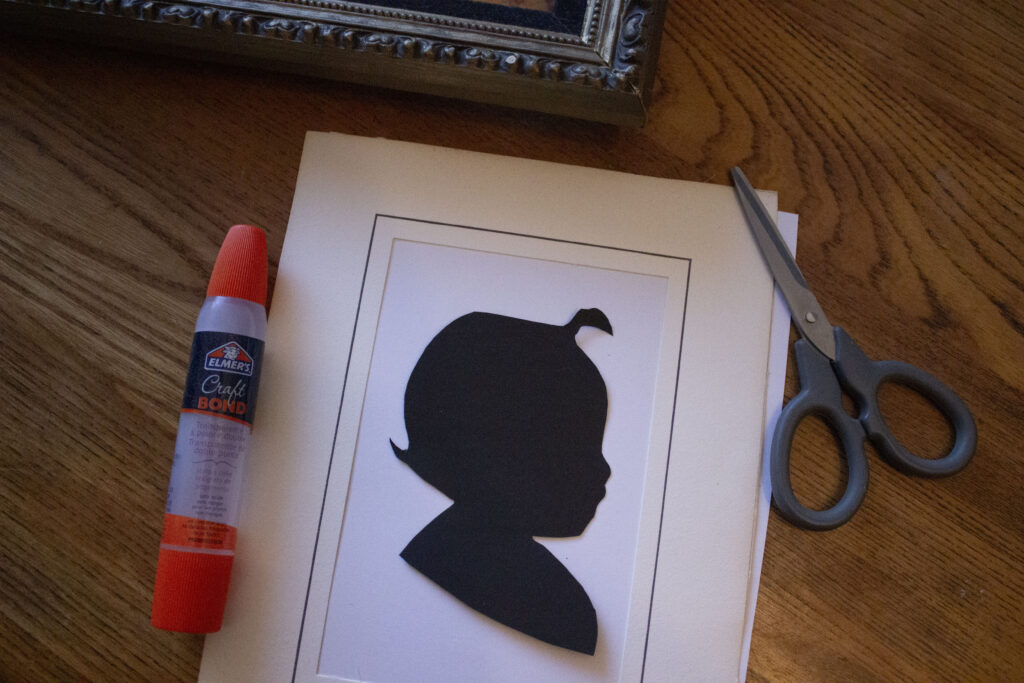
Lay the black cutout onto the white paper, making sure it is centered, and glue it in place. Let dry.
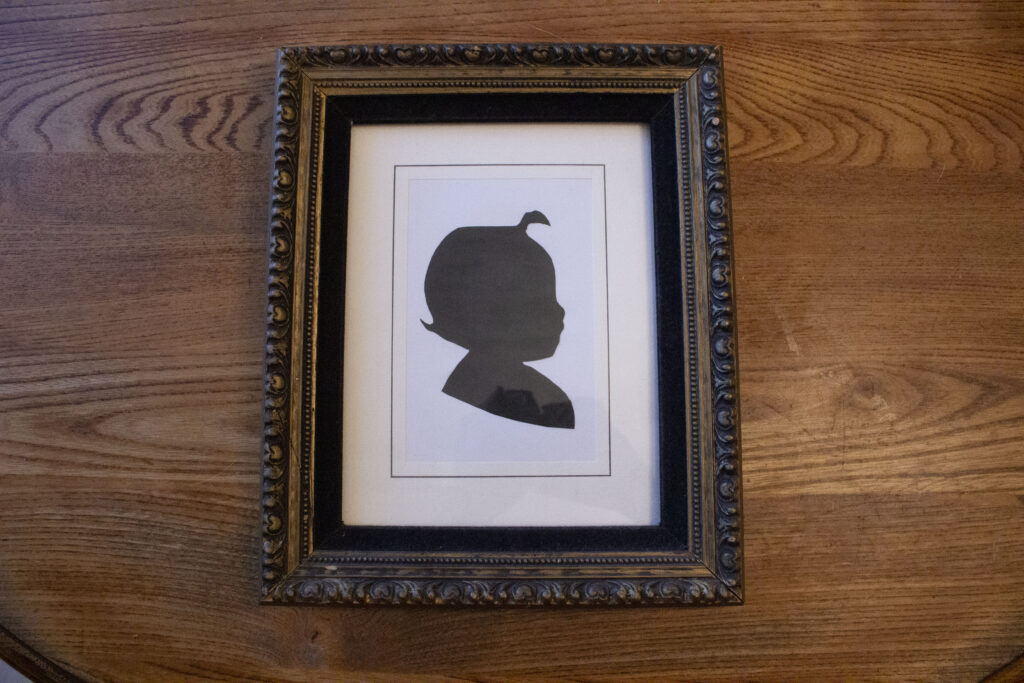
Frame your finished product. A mat is a nice way to make this look more polished!
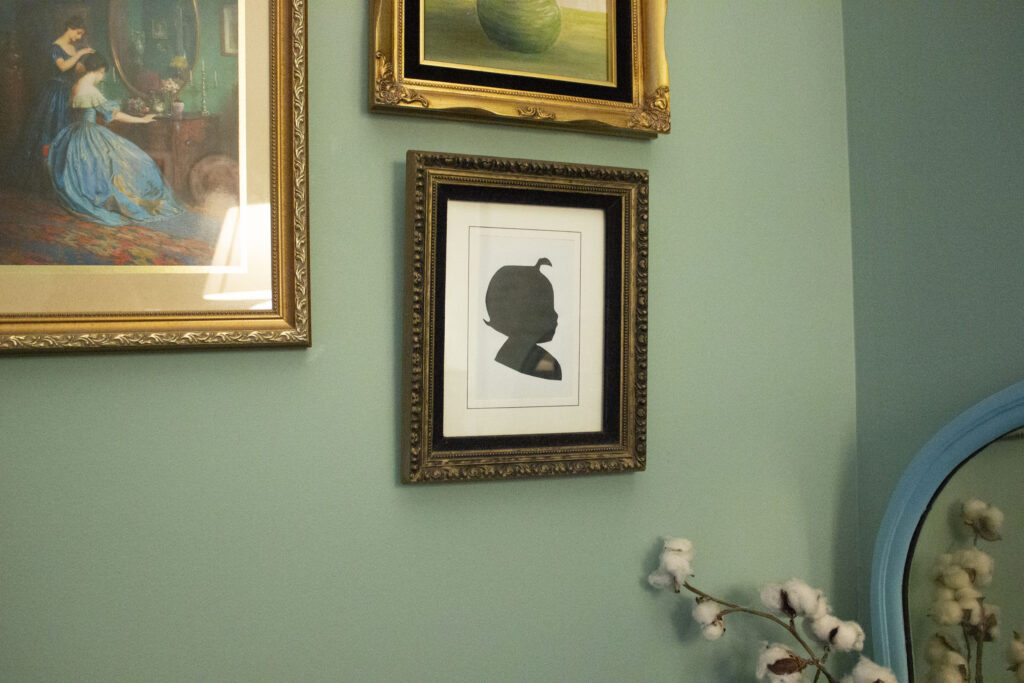
So there you have it! A beautiful keepsake that is relatively easy to make. If you have multiple children, this is something you could do for each child and hang them together in a group.
Did you recreate this DIY project? Post yours on Instagram and tag @Lauren_Rose_Home on Instagram. I’d love to see your creations!

Design, thrifting, and entertaining are my passion, and I share that passion with you through this blog. I also love being in the kitchen and crafting cocktails. I love Jesus and occasionally, I talk about him too. He has been so powerful in my life, and I love to bring him glory with my hobbies.

©2025 Lauren Correa. All rights reserved. Design by Lauren Correa.