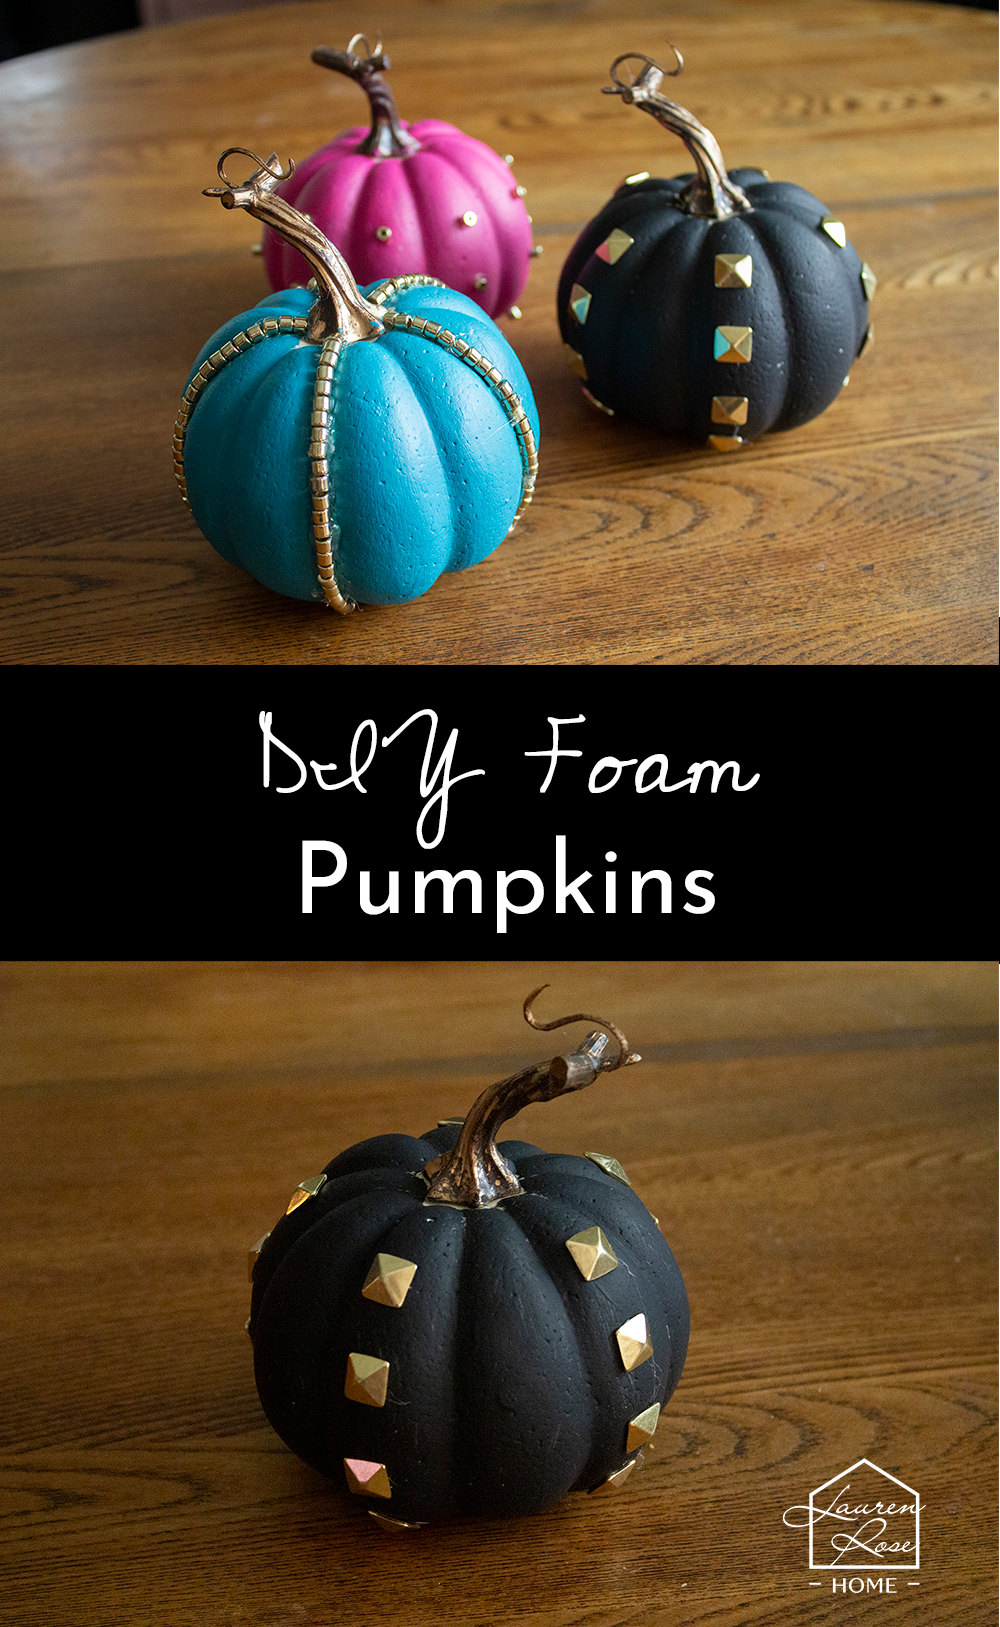
DIY Dollar Tree Foam Pumpkins – 3 Ways to Decorate Them
The Dollar Tree is chock full of craft supplies and cute fall décor. Much of it is quite generic and
sometimes a bit cheesy, but there are still plenty of ways to customize this inexpensive décor to suite
your style. I found three foam pumpkins and decided to upcycle them to match my living room!
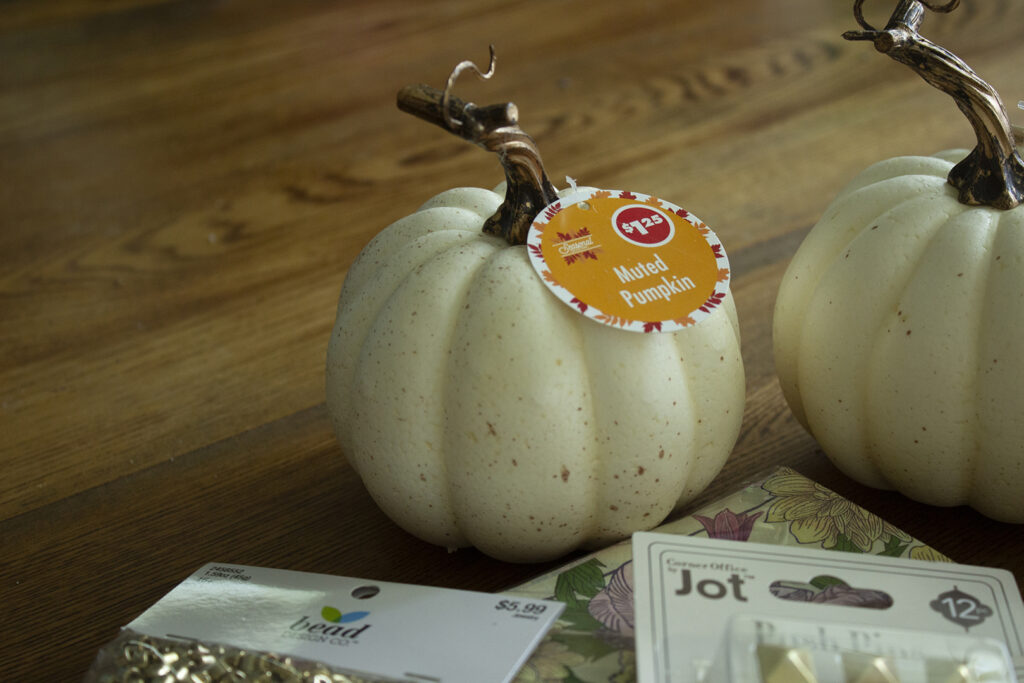
Using supplies from Dollar Tree and Hobby Lobby, I was able to create three colorful pumpkins that look
elegant and edgy. Gather your supplies and then follow these simple tutorials to create your own!
Pumpkin #1: Edgy Studded Pumpkin
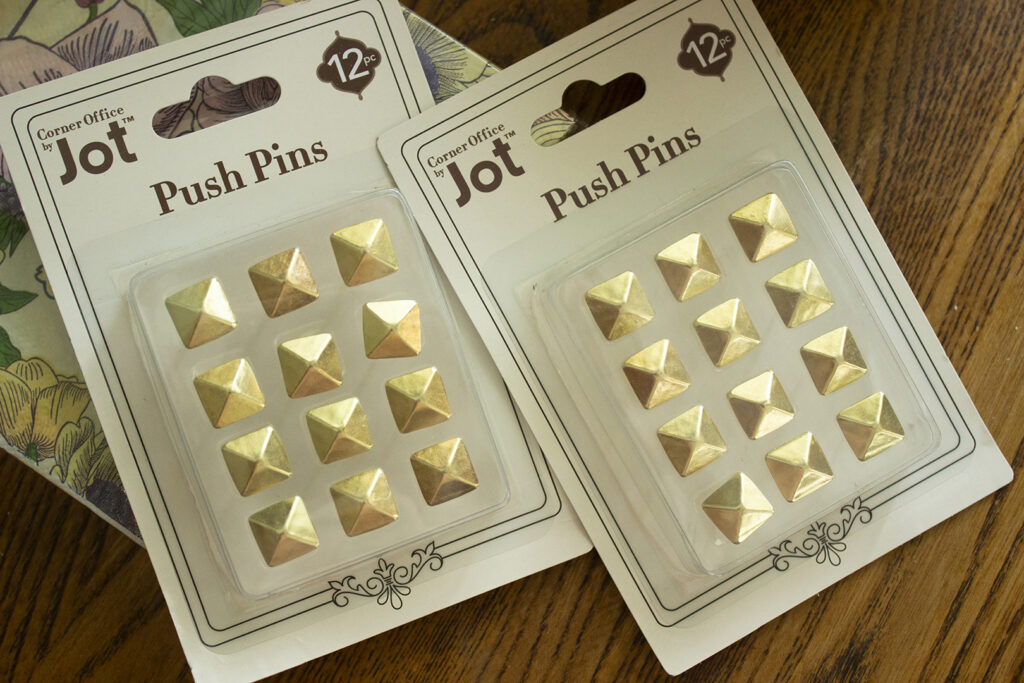
Supplies: A foam pumpkin, studded push pins available at Dollar Tree, a hot glue gun and some acrylic
paint in your color of choice. I chose black!
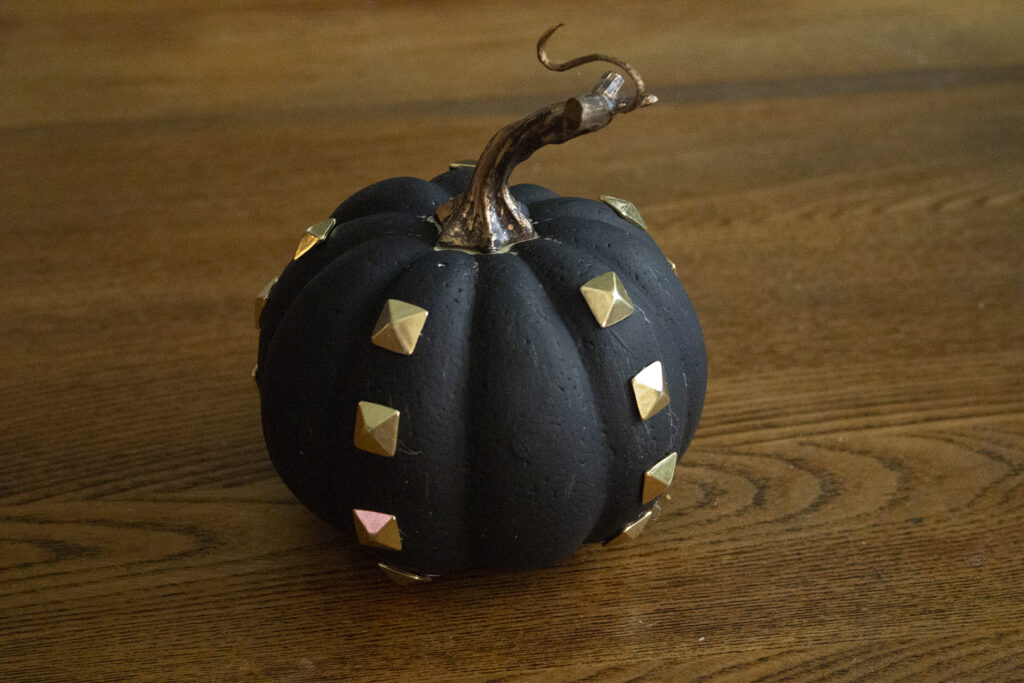
Directions: Determine the pattern you want the studs to be in. I did four studs per section of the
pumpkin, so I actually needed two boxes of the push pins for this project. Before you insert the push pin,
put a dot of hot glue in the place where the pin will be inserted, and then push the pin into that dot. This
helps provide extra security and ensures that the pins won’t fall out too easily.
Pumpkin #2: Beaded Pumpkin
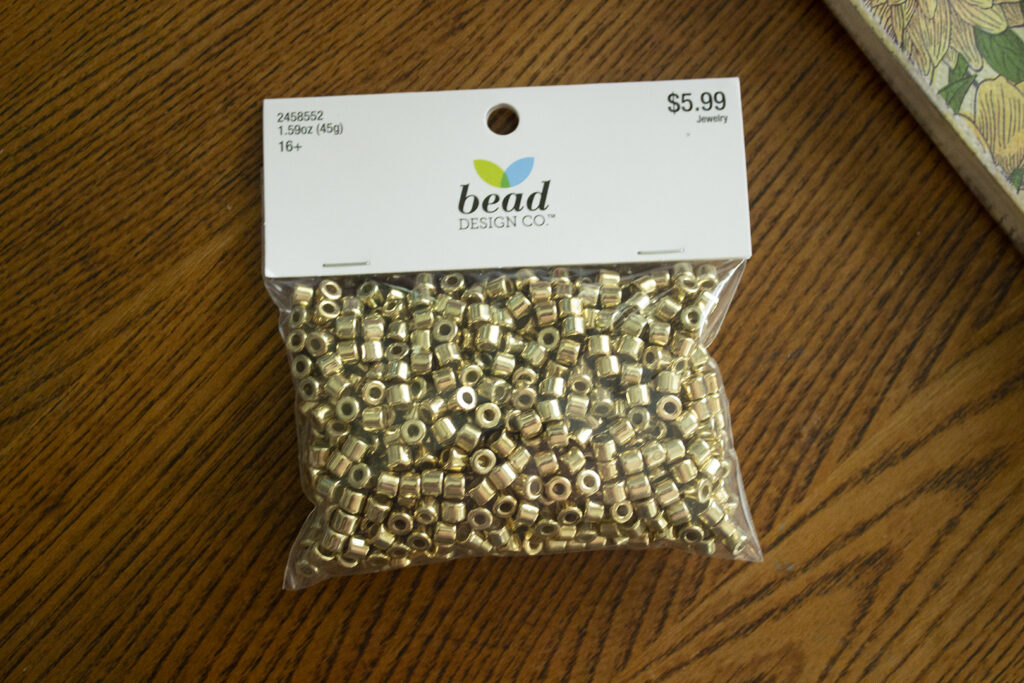
Supplies: A foam pumpkin, beads, paint, and a glue gun. I used gold beads that I found at Hobby Lobby
and a blue paint sample in the color Caribe leftover from painting my living room. You can opt for acrylic
paint instead.
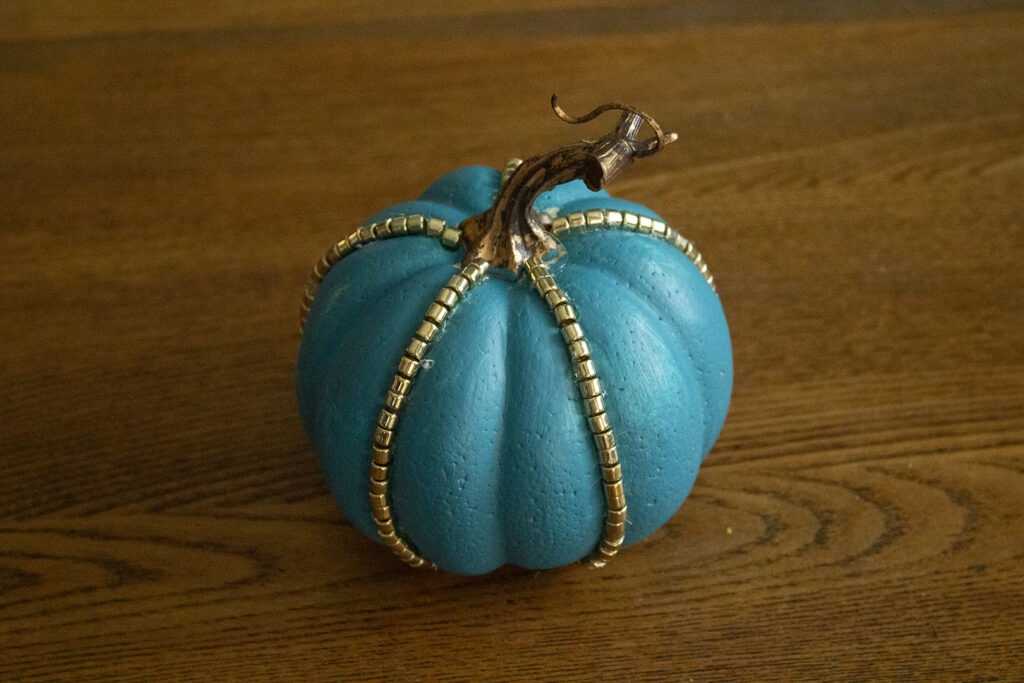
Directions: Working in very small, half inch sections, draw a line of hot glue along the ridges of the
pumpkin and place the beads in a row in the glue. Again, it’s important to work in small sections so that
the glue doesn’t dry before you put the beads in. Take your time and be patient for best results! I only
did beads in ever other ridge of the pumpkin, but you could put beads in every ridge if you wanted to.
Pumpkin #3: Beaded Pumpkin
Supplies: A foam pumpkin, beads, and a glue gun.
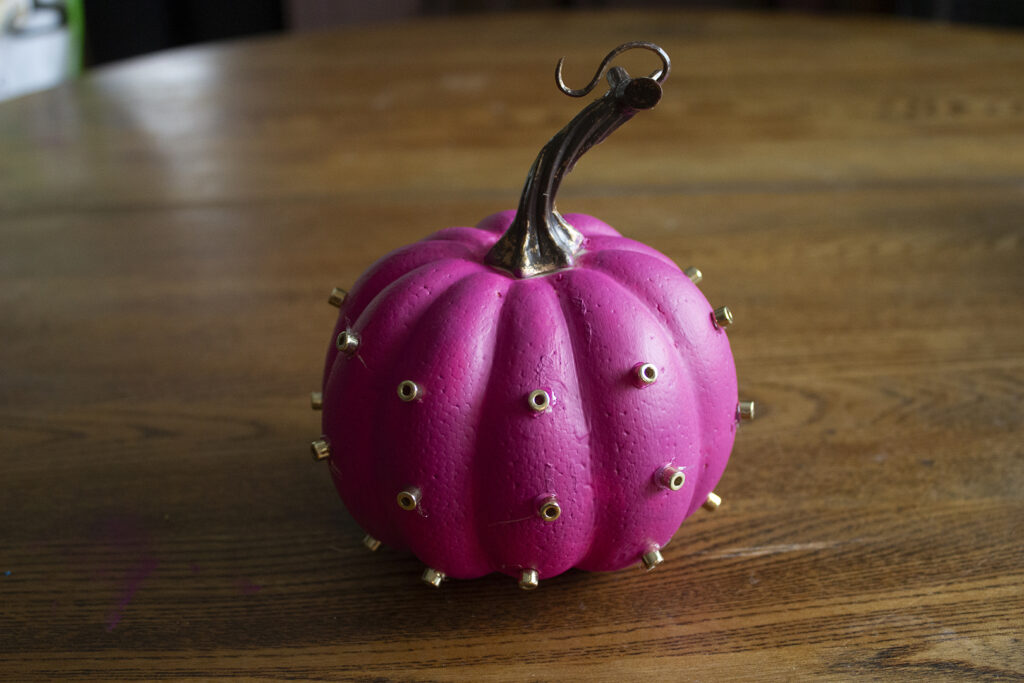
Directions: For a change of texture, I used the same beads from the previous pumpkin and glued them
on with the holes facing outward. You can do this in whatever pattern you choose! I choose to glue
three beads per section, all spaced evenly apart.

Which easy pumpkin project was your favorite? Let me know in the comments!


You May Also Like
DIY Painted Mini Pumpkins
DIY Framed Silhouette Portrait